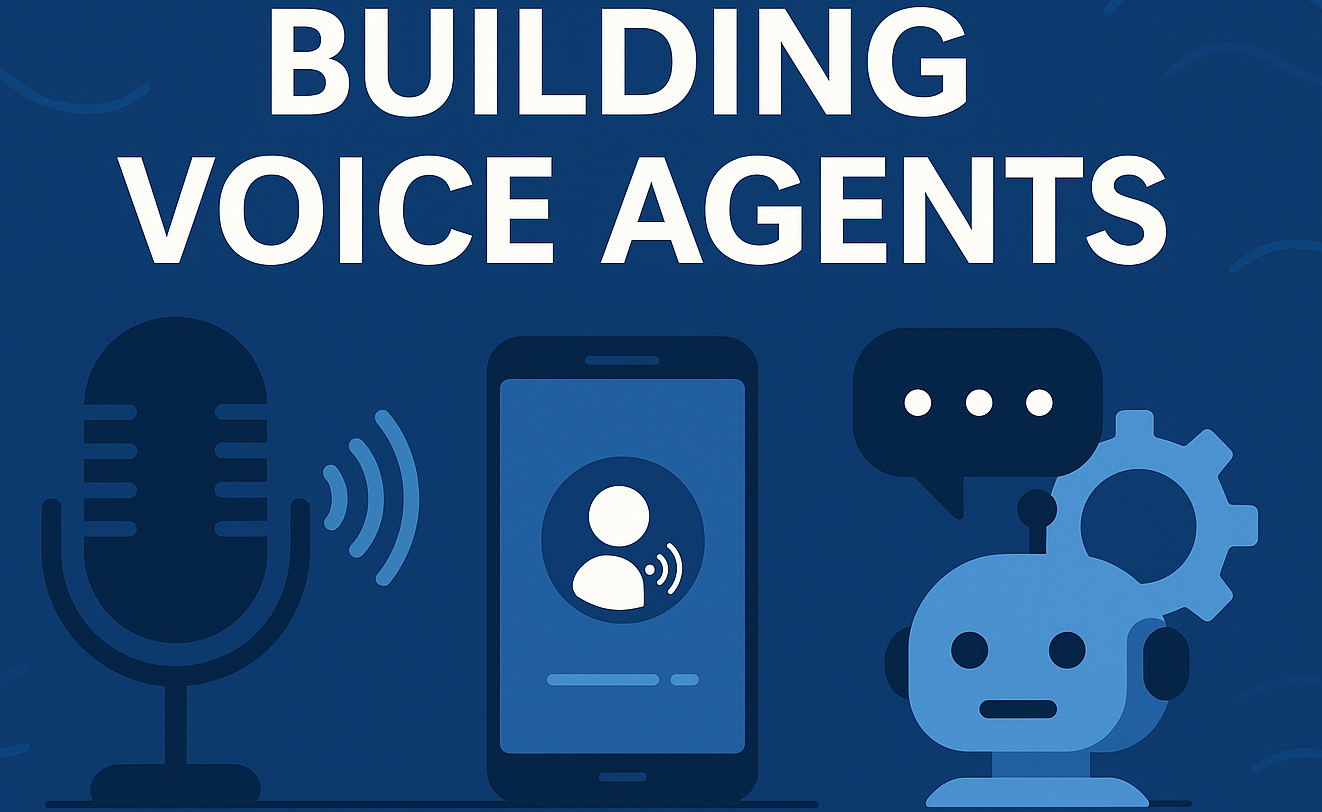
Building Voice Agents with Azure Communication Services Voice Live API and Azure AI Agent Service

Building Voice Agents with Azure Communication Services Voice Live API and Azure AI Agent Service


🎯 TL;DR: Real-time Voice Agent Implementation

This post walks through building a voice agent that connects traditional phone calls to Azure’s AI services. The system intercepts incoming calls via Azure Communication Services, streams audio in real-time to the Voice Live API, and processes conversations through pre-configured AI agents in Azure AI Studio. The implementation uses FastAPI for webhook handling, WebSocket connections for bidirectional audio streaming, and Azure Managed Identity for authentication (no API keys to manage). The architecture handles multiple concurrent calls on a single Python thread using asyncio.

Implementation details: Audio resampling between 16kHz (ACS requirement) and 24kHz (Voice Live requirement), connection resilience for preview services, and production deployment considerations. Full source code and documentation available here


Recently, I found myself co-leading an innovation project that pushed me into uncharted territory. The challenge? Developing a voice-based agentic solution with an ambitious goal - routing at least 25% of current contact center calls to AI voice agents. This was bleeding-edge stuff, with both the Azure Voice Live API and Azure AI Agent Service voice agents still in preview at the time of writing.

When you’re working with preview services, documentation is often sparse, and you quickly learn that reverse engineering network calls and maintaining close relationships with product teams becomes part of your daily routine. This blog post shares the practical lessons learned and the working solution we built to integrate these cutting-edge services.

The Innovation Challenge

Building a voice agent system that could handle real customer interactions meant tackling several complex requirements:

  • Real-time voice processing with minimal latency
  • Natural conversation flow without awkward pauses
  • Integration with existing contact center infrastructure
  • Scalability to handle multiple concurrent calls
  • Reliability for production use cases

With both Azure Voice Live API and Azure AI Voice Agent Service in preview, we were essentially building on shifting sands. But that’s what innovation is about - pushing boundaries and finding solutions where documentation doesn’t yet exist.

Understanding the Architecture

Our solution bridges Azure Communication Services (ACS) with Azure AI services to create an intelligent voice agent. Here’s how the pieces fit together:

graph TB
    subgraph "Phone Network"
        PSTN[📞 PSTN Number
+1-555-123-4567] end subgraph "Azure Communication Services" ACS[🔗 ACS Call Automation
Event Grid Webhooks] MEDIA[🎵 Media Streaming
WebSocket Audio] end subgraph "Python FastAPI App" API[🐍 FastAPI Server
localhost:49412] WS[🔌 WebSocket Handler
Audio Processing] HANDLER[⚡ Media Handler
Audio Resampling] end subgraph "Azure OpenAI" VOICE[🤖 Voice Live API
Agent Mode
gpt-4o Realtime] AGENT[👤 Pre-configured Agent
Azure AI Studio] end subgraph "Dev Infrastructure" TUNNEL[🚇 Dev Tunnel
Public HTTPS Endpoint] end PSTN -->|Incoming Call| ACS ACS -->|Webhook Events| TUNNEL TUNNEL -->|HTTPS| API ACS -->|WebSocket Audio| WS WS -->|PCM 16kHz| HANDLER HANDLER -->|PCM 24kHz| VOICE VOICE -->|Agent Processing| AGENT AGENT -->|AI Response| VOICE VOICE -->|AI Response| HANDLER HANDLER -->|PCM 16kHz| WS WS -->|Audio Stream| ACS ACS -->|Audio| PSTN style PSTN fill:#ff9999 style ACS fill:#87CEEB style API fill:#90EE90 style VOICE fill:#DDA0DD style TUNNEL fill:#F0E68C

Core Components

  1. Azure Communication Services: Handles the telephony infrastructure, providing phone numbers and call routing
  2. Voice Live API: Enables real-time speech recognition and synthesis with WebRTC streaming
  3. Azure AI Agent Service: Provides the intelligence layer for understanding and responding to customer queries
  4. WebSocket Bridge: Our custom Python application that connects these services
Read more
Getting TFVC Repository Structure via Azure DevOps Server API

Getting TFVC Repository Structure via Azure DevOps Server API


🎯 TL;DR: Retrieving TFVC Repository Structure via REST API

This post demonstrates how to programmatically enumerate TFVC repository folders using Azure DevOps Server REST APIs. Unlike Git repositories, TFVC follows a one-repository-per-project model with hierarchical folder structures starting at $/ProjectName. The solution uses the TFVC Items API with specific parameters: scopePath=$/ProjectName to target the project root, and recursionLevel=OneLevel to retrieve immediate children. The implementation handles authentication via Personal Access Tokens, filters results to show only folders (excluding the root), and includes error handling for projects without TFVC repositories or insufficient permissions.

Key technical details: PowerShell script implementation, proper API parameter usage, authentication setup, and handling edge cases like empty repositories and access permissions. Complete PowerShell script and utilities available here


Recently, I was asked an interesting question by a developer who was struggling with Azure DevOps Server APIs around fetching repository metadata for legacy TFVC structures as part of a GitHub migration from ADO Server. This was a nice little problem to solve because, let’s be honest, we don’t really deal with these legacy TFVC repositories much anymore. Most teams have migrated to Git, and the documentation around TFVC API interactions has become somewhat sparse over the years.

The challenge was straightforward but frustrating: they could retrieve project information just fine, but getting the actual TFVC folder structure within each project? That’s where things got tricky. After doing a bit of digging through the API documentation and testing different approaches, I’m happy to say that yes, it is absolutely possible to enumerate all TFVC repositories and their folder structures programmatically.

This blog post shares the solution I put together - a practical approach to retrieve TFVC repository structure using the Azure DevOps Server REST APIs. If you’re working with legacy TFVC repositories and need to interact with them programmatically, this one’s for you.

The Challenge: Understanding TFVC API Limitations

Unlike Git repositories where each project can contain multiple repos, TFVC follows a different model where each project contains exactly one TFVC repository. This fundamental difference affects how you interact with the API and retrieve repository information.

The main challenge developers face is distinguishing between project metadata and actual TFVC repository structure. When calling the standard Projects API, you receive project information but not the folder structure within the TFVC repository itself.

Read more
How We United 8 Developers Across Restricted Environments Using Azure VMs and Dev Containers

How We United 8 Developers Across Restricted Environments Using Azure VMs and Dev Containers


🎯 TL;DR: Distributed Development with Azure VMs and Dev Containers

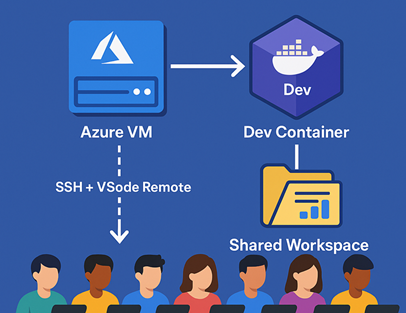
This post details solving a distributed development challenge where 8 developers from different organizations needed to collaborate on an AutoGen AI project - 4 from restricted corporate environments unable to install development tools, and 4 external developers without access to client systems. The solution uses a shared Azure VM (Standard D8s v3) with individual user accounts, certificate-based SSH authentication, and VS Code Remote Development connected to a shared Dev Container environment. The architecture eliminates “works on my machine” issues by providing consistent development environments, shared resources (datasets, models, configs), and enables real-time collaboration.

Implementation highlights: Automated user provisioning scripts, VS Code Remote-SSH configuration, comprehensive devcontainer.json with pre-installed Python 3.12/AutoGen/Azure CLI, shared directory structures, and security hardening with fail2ban and UFW. Development environment setup scripts and configurations documented here


Introduction: When Traditional Solutions Hit a Wall

Last month, I found myself facing a challenge that I’m sure many of you have encountered: How do you enable seamless collaboration for a development team when half of them work in a locked-down environment where they can’t install any development tools, and the other half can’t access the client’s systems?

Our team of eight developers was tasked with building a proof-of-concept (PoC) for an AI-powered agentic system using Microsoft’s AutoGen framework. Here’s the kicker: this was a 3-week PoC sprint bringing together two teams from different organizations who had never worked together before. We needed a collaborative environment that could be spun up quickly, require minimal setup effort, and allow everyone to hit the ground running from day one.

The project requirements were complex enough, but the real challenge? Four developers worked from a highly restricted corporate environment where installing Python, VS Code, or any development tools was strictly prohibited. The remaining four worked from our offices but couldn’t access the client’s internal systems directly.

We tried the usual approaches:

  • RDP connections: Blocked by security policies
  • VPN access: Denied due to compliance requirements
  • Local development with file sharing: Immediate sync issues and “works on my machine” problems
  • Cloud IDEs: Didn’t meet the client’s security requirements

Just when we thought we’d have to resort to the dreaded “develop locally and pray it works in production” approach, we discovered a solution that not only solved our immediate problem but revolutionized how we approach distributed development.

The Architecture That Worked For Us

Here’s a visual representation of what we built, everyone had to work on their personal (non-corporate) laptops for this to work.

flowchart TD
    A["� 8 Developers on Personal Laptops
4 Restricted + 4 External Teams"] B["� SSH + VS Code Remote Connection
Certificate-based Authentication"] C["☁️ Azure VM (Standard D8s v3)
8 vCPUs • 32GB RAM • Ubuntu 22.04"] D["👤 Individual User Accounts
user1, user2, user3... user8"] E["🐳 Shared Dev Container
Python 3.12 + AutoGen + Azure CLI
All Dependencies Pre-installed"] F["📂 Shared Development Resources
• Project Repository
• Datasets & Models
• Configuration Files"] G["✅ Results Achieved
94% Faster Onboarding
$400/month vs $16k laptops
Enhanced Security"] A --> B B --> C C --> D D --> E E --> F F --> G style A fill:#e3f2fd,stroke:#1976d2,stroke-width:3px,color:#000 style B fill:#f3e5f5,stroke:#7b1fa2,stroke-width:3px,color:#000 style C fill:#e1f5fe,stroke:#0277bd,stroke-width:3px,color:#000 style D fill:#fff3e0,stroke:#f57c00,stroke-width:3px,color:#000 style E fill:#f3e5f5,stroke:#7b1fa2,stroke-width:3px,color:#000 style F fill:#fff3e0,stroke:#f57c00,stroke-width:3px,color:#000 style G fill:#e8f5e8,stroke:#388e3c,stroke-width:3px,color:#000

Lets check out how this was built and setup…

Read more
Custom Voices in Azure OpenAI Realtime with Azure Speech Services

Custom Voices in Azure OpenAI Realtime with Azure Speech Services


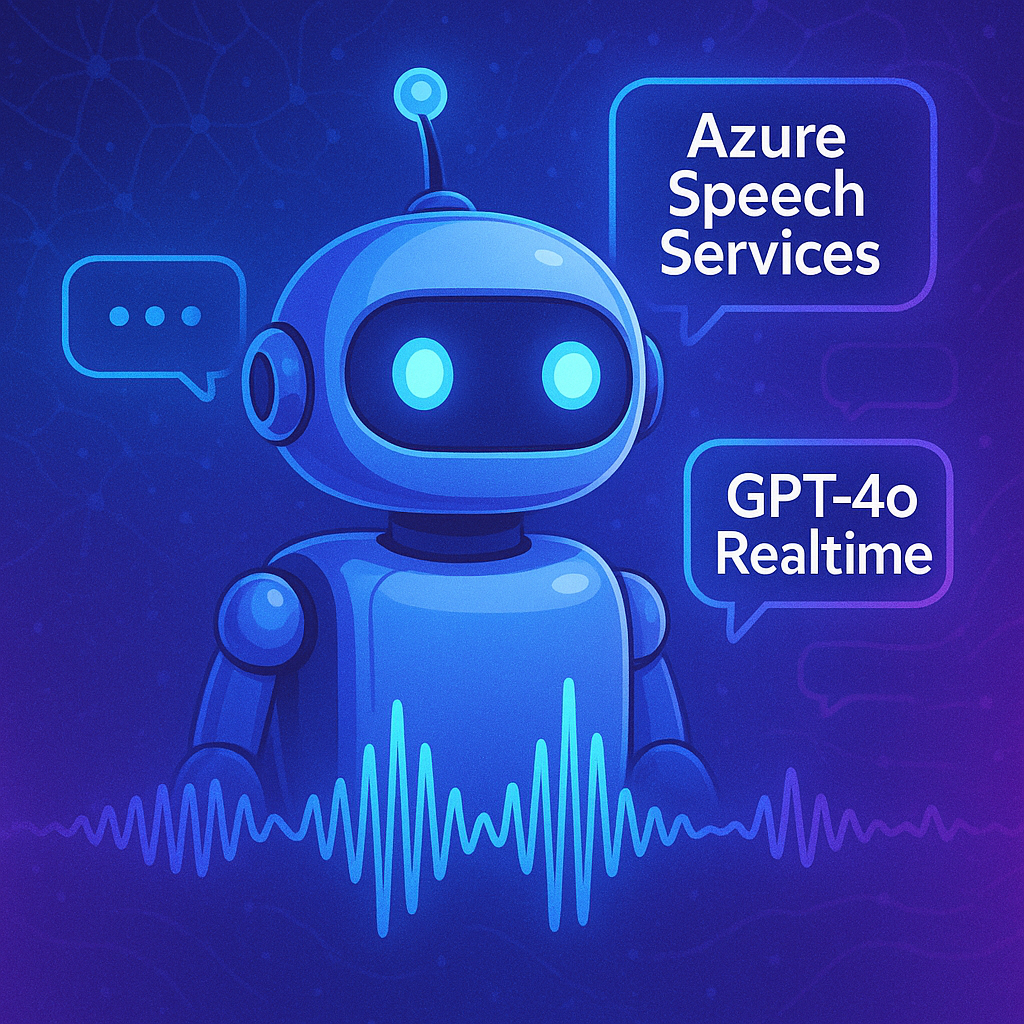
🎯 TL;DR: Hybrid GPT-4o Realtime with Azure Speech Services Custom Voices

This post demonstrates bypassing GPT-4o Realtime’s built-in voice limitations by creating a hybrid architecture that combines GPT-4o’s conversational intelligence with Azure Speech Services’ extensive voice catalog. The solution configures GPT-4o Realtime for text-only output (ContentModalities.Text) and routes responses through Azure Speech Services, enabling access to 400+ neural voices, custom neural voices (CNV), and SSML control. The implementation includes intelligent barge-in functionality using real-time audio amplitude monitoring, allowing users to interrupt the assistant naturally mid-response.

Technical implementation: C# application using Azure.AI.OpenAI and Microsoft.CognitiveServices.Speech SDKs, NAudio for audio I/O, streaming text collection from GPT-4o responses, RMS-based speech detection with configurable thresholds, and concurrent audio management for seamless interruption handling. Complete C# source code with audio helpers available here


Building realtime voice-enabled applications with Azure OpenAI’s GPT-4o Realtime model is incredibly powerful, but there’s one significant limitation that can be a deal-breaker for many use cases: you’re stuck with OpenAI’s predefined voices like “sage”, “alloy”, “echo”, “fable”, “onyx”, and “nova”.

What if you’re building a branded customer service bot that needs to match your company’s voice identity? Or developing a therapeutic application for children with autism where the voice quality and tone are crucial for engagement? What if your users need to interrupt the assistant naturally, just like in real human conversations?

In this comprehensive guide, I’ll show you exactly how I solved these challenges by building a hybrid solution that combines the conversational intelligence of GPT-4o Realtime with the voice flexibility of Azure Speech Services. We’ll dive deep into the implementation, covering everything from the initial problem to the complete working solution.

flowchart TD
    A[👤 User speaks] --> B[🎤 Microphone Input]
    B --> C{Barge-in Detection
Audio Level > Threshold?} C -->|Yes| D[🛑 Stop Azure Speech] C -->|No| E[📡 Stream to GPT-4o Realtime] E --> F[🧠 GPT-4o Processing] F --> G[📝 Text Response
ContentModalities.Text] G --> H[🗣️ Azure Speech Services
Custom/Neural Voice] H --> I[🔊 Audio Output] D --> E I --> J[👂 User hears response] J --> A style A fill:#e1f5fe style D fill:#ffebee style G fill:#f3e5f5 style H fill:#e8f5e8 style I fill:#fff3e0
Read more
Ignoring Azurite Files

Ignoring Azurite Files


🎯 TL;DR: Managing Azurite Storage Emulation Files in VS Code

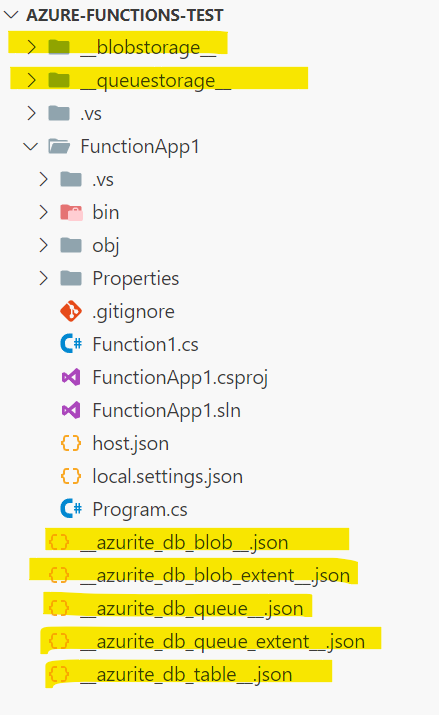
Local development with Azure Functions often requires Azurite (Azure Storage Emulator replacement) which generates storage files that clutter VS Code workspace. Problem: __azurite__, __blobstorage__, and __queuestorage__ directories appear in project explorer making navigation difficult. Solution: Configure VS Code files.exclude settings to hide these emulation artifacts while preserving their functionality for local development and testing.


In the old days, developers relied on the Azure Storage Emulator to emulate Azure Storage services locally. However, Azure Storage Emulator has been deprecated and replaced with Azurite, which is now the recommended way to emulate Azure Blob, Queue, and Table storage locally. In this post, let’s see how to set up exclusions in Visual Studio Code to prevent unwanted Azurite files from cluttering your workspace while working with Function Apps.

Azurite files

Read more
Extracting GZip & Tar Files Natively in .NET Without External Libraries

Extracting GZip & Tar Files Natively in .NET Without External Libraries


🎯 TL;DR: Native .tar.gz Extraction in .NET 7 Without External Dependencies

Processing compressed .tar.gz files in Azure Functions traditionally required external libraries like SharpZipLib. Problem: External dependencies increase complexity and security surface area. Solution: .NET 7 introduces native System.Formats.Tar namespace alongside existing System.IO.Compression for GZip, enabling complete .tar.gz extraction without external dependencies. Implementation uses GZipStream for decompression and TarReader for archive extraction with proper entry type filtering and async operations.


Introduction

Imagine being in a scenario where a file of type .tar.gz lands in your Azure Blob Storage container. This file, when uncompressed, yields a collection of individual files. The trigger event for the arrival of this file is an Azure function, which springs into action, decompressing the contents and transferring them into a different container.

In this context, a team may instinctively reach out for a robust library like SharpZipLib. However, what if there is a mandate to accomplish this without external dependencies? This becomes a reality with .NET 7.

In .NET 7, native support for Tar files has been introduced, and GZip is catered to via System.IO.Compression. This means we can decompress a .tar.gz file natively in .NET 7, bypassing any need for external libraries.

This post will walk you through this process, providing a practical example using .NET 7 to show how this can be achieved.

.NET 7: Native TAR Support

As of .NET 7, the System.Formats.Tar namespace was introduced to deal with TAR files, adding to the toolkit of .NET developers:

  • System.Formats.Tar.TarFile to pack a directory into a TAR file or extract a TAR file to a directory
  • System.Formats.Tar.TarReader to read a TAR file
  • System.Formats.Tar.TarWriter to write a TAR file

These new capabilities significantly simplify the process of working with TAR files in .NET. Lets dive in an have a look at a code sample that demonstrates how to extract a .tar.gz file natively in .NET 7.

Read more
Unzipping and Shuffling GBs of Data Using Azure Functions

Unzipping and Shuffling GBs of Data Using Azure Functions


🎯 TL;DR: Stream-Based Large File Processing in Azure Functions

Processing multi-gigabyte zip files in Azure Functions requires streaming approach due to 1.5GB memory limit on Consumption plan. Problem: Large compressed files cannot be loaded entirely into memory for extraction. Solution: Stream-based unzipping using blob triggers with two implementation options: native .NET ZipArchive (slower but dependency-free) vs SharpZipLib (faster with custom buffer sizes). Architecture includes separate blob containers for zipped/unzipped files with Function App triggered by blob storage events for scalable data processing.


Consider this situation: you have a zip file stored in an Azure Blob Storage container (or any other location for that matter). This isn’t just any zip file; it’s large, containing gigabytes of data. It could be big data sets for your machine learning projects, log files, media files, or backups. The specific content isn’t the focus - the size is.

The task? We need to unzip this massive file(s) and relocate its contents to a different Azure Blob storage container. This task might seem daunting, especially considering the size of the file and the potential number of files that might be housed within it.

Why do we need to do this? The use cases are numerous. Handling large data sets, moving data for analysis, making backups more accessible - these are just a few examples. The key here is that we’re looking for a scalable and reliable solution to handle this task efficiently.

Azure Data Factory is arguably a better fit for this sort of task, but In this blog post, we will specifically demonstrate how to establish this process using Azure Functions. Specifically we will try to achieve this within the constraints of the Consumption plan tier, where the maximum memory is capped at 1.5GB, with the supporting roles of Azure CLI and PowerShell in our setup.

Setting Up Our Azure Environment

Before we dive into scripting and code, we need to set the stage - that means setting up our Azure environment. We’re going to create a storage account with two containers, one for our Zipped files and the other for Unzipped files.

To create this setup, we’ll be using the Azure CLI. Why? Because it’s efficient and lets us script out the whole process if we need to do it again in the future.

  1. Install Azure CLI: If you haven’t already installed Azure CLI on your local machine, you can get it from here.

  2. Login to Azure: Open your terminal and type the following command to login to your Azure account. You’ll be prompted to enter your credentials.

    1
    az login    
  3. Create a Resource Group: We’ll need a Resource Group to keep our resources organized. We’ll call this rg-function-app-unzip-test and create it in the eastus location (you can ofcourse choose which ever region you like).

    1
    az group create --name rg-function-app-unzip-test --location eastus    
Read more
Azure DevTest Labs Policies

Azure DevTest Labs Policies


🎯 TL;DR: DevTest Labs Policy Configuration with Bicep IaC

Azure DevTest Labs documentation covers basic lab deployment but lacks policy configuration examples in Bicep. Problem: Missing guidance on linking policies to DevTest Labs using Infrastructure as Code. Solution: Use Microsoft.DevTestLab/labs/policysets resource with ‘default’ name as parent for policy definitions. Implementation includes VM size restrictions, user VM quotas, and premium SSD limits using evaluator types like AllowedValuesPolicy and MaxValuePolicy with proper threshold configurations.


Azure DevTest Labs offers a powerful cloud-based development workstation environment and great alternative to a local development workstation/laptop when it comes to software development. This blog post is not so much talking about the benefits of DevTest Lab, but more about how to create policies for DevTest Labs using Bicep. Although there is a good support for deploying DevTest labs with Bicep, there is little to no documentation when it comes to creating policies for DevTest Labs in Bicep. In this blog post, we will focus on creating policies for DevTest Labs using Bicep and how to go about doing this.

A Brief Overview of Azure DevTest Labs

Azure DevTest Labs is a managed service that enables developers to quickly create, manage, and share development and test environments. It provides a range of features and tools designed to streamline the development process, minimize costs, and improve overall productivity. By leveraging the power of the cloud, developers can easily spin up virtual machines (VMs) pre-configured with the necessary tools, frameworks, and software needed for their projects.

Existing Documentation Limitations

While the existing documentation covers various aspects of Azure DevTest Labs, it lacks clear guidance on setting up policies with DevTest Labs in Bicep. This blog post aims to address that gap by providing a Bicep script for creating a DevTest Lab and applying policies to it. Shout out to my colleague Illian Y for persisting and not giving up and finding a away around undocumented features and showing me.

Read more
Azure Logic Apps Timeout

Azure Logic Apps Timeout


🎯 TL;DR: Timeout Control Strategies for Azure Logic Apps

Logic Apps default timeout behavior doesn’t match production requirements with HTTP triggers timing out at 3.9 minutes and workflow duration defaulting to 90 days. Problem: No granular timeout control per workflow causing long-running processes in production. Solutions: Global Runtime.Backend.FlowRunTimeout setting (minimum 7 days, affects all workflows) or per-workflow timeout branches using parallel “Delay” action with terminate condition for precise timeout control without impacting other workflows.


Recently I got pulled into a production incident where a logic app was running for a long time (long time in this scenario was > 10 minutes), but the intention from the dev crew was they wanted this to time out in 60 seconds. These logic apps were a combination of HTTP triggers and Timer based.

Logic App Default Time Limits

First things to keep in mind are some default limits.

  1. If its a HTTP based trigger the default timeout is around 3.9 minutes

  2. For most others the default max run duration of a logic app is 90 days and min is 7 days

Ways To Change Defaults

With that, here are a couple of quick ways to make sure your Logic App times out and terminates within the time frame you set. Lets say if we want our Logic App to run no more than 60 seconds at max then:

Read more
Create A Multi User Experience For Single Threaded Applications Using Azure Container Apps

Create A Multi User Experience For Single Threaded Applications Using Azure Container Apps


🎯 TL;DR: Simulating Multi-User Experience for Legacy Single-Threaded Apps

Legacy single-threaded applications (one request per process) require multi-user support without costly re-architecture. Problem: Applications with static locks block entire process during request handling. Solution: Azure Container Apps with HTTP-based scaling rules that spawn new container instances per concurrent request. Configuration uses min-replicas=0, max-replicas=30 with HTTP scale triggers, achieving 70-90% request isolation across separate container instances for pseudo-multithreaded behavior without code changes.


How to make a single-threaded app multi-threaded? This is the scenario I faced very recently. These were legacy web app(s) written to be single-threaded; in this context single-threaded means can only serve one request at a time. I know this goes against everything that a web app should be, but it what it is.

So if we have a single threaded web app (legacy) now all of a sudden we have a requirement to support multiple users at the same time. What are our options:

  1. Re-architect the app to be multi threaded
  2. Find a way to simulate multi threaded behavior

Both are great options, but in this scenario option 1 was out, due to the cost involved in re-writing this app to support multi threading. So that leaves us with option 2; how can we at a cloud infra level easily simulate multi threaded behavior. Turns out if we containerize the app (in this case it was easy enough to do) we orchestrate the app such that for each http request is routed to a new container (ie: every new http request should spin up a new container and request send to it)

Options For Running Containers

So when it comes to running a container in Azure our main options are below

Read more